|
|
|
|
|
|
|
|
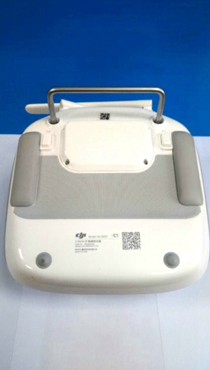
1. |
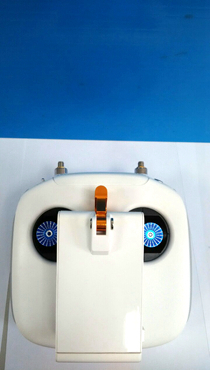
|
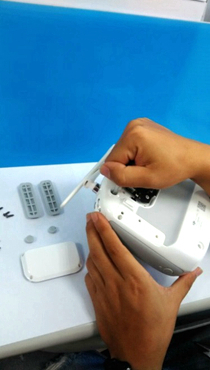
Put controller on the soft mat. |
|
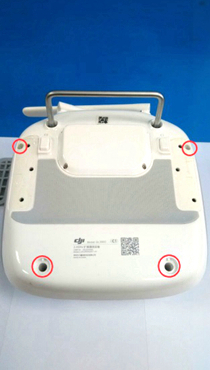
2. |
|
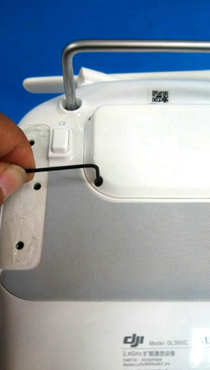
Remove 4 rubber plugs;
There are 4 screws. |
| |
|
|
|
|
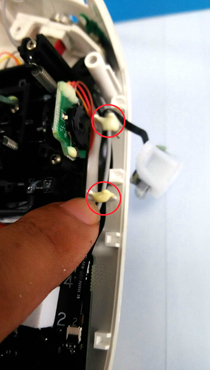
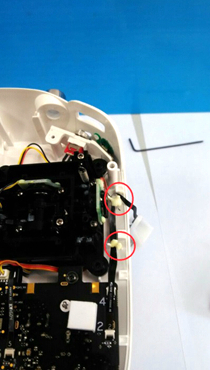
|
|
|
|
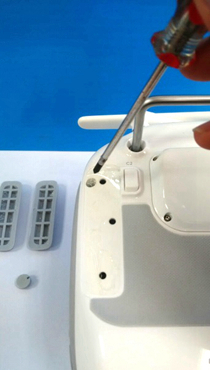
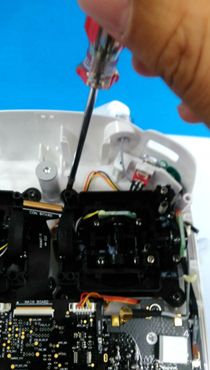
3. |
|
Use Phillips screwdriver to remove 4 screws. |
|
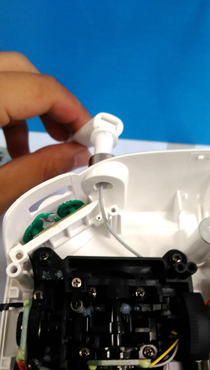
4. |
|
After screws were removed, the next step is to remove hex head screws of USB cover. |
| |
|
|
|
|
|
|
|
|
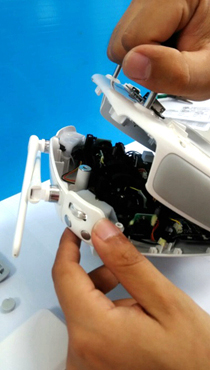
5. |
|
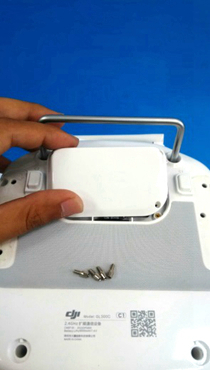
Use hex key to remove 4 screws. |
|
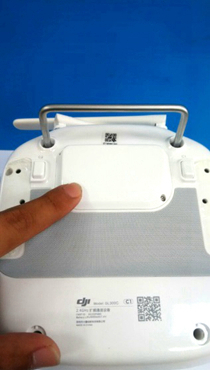
6. |
|
Remove the cover. |
| |
|
|
|
|
|
|
|
|
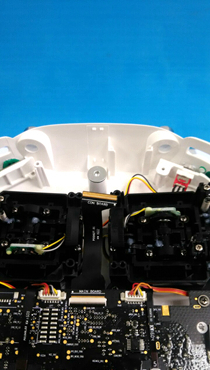
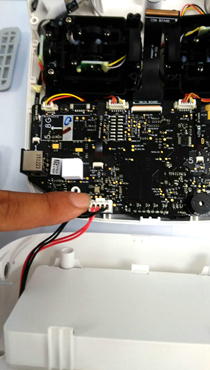
7. |
|
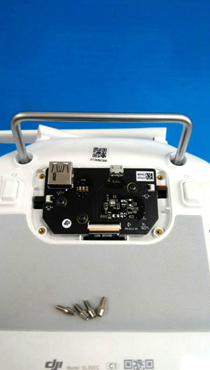
There are circuit board and flat cable connected. |
|
8. |
|
Should take apart the flat cable before separate the controller shell. |
| |
|
|
|
|
|
|
|
|
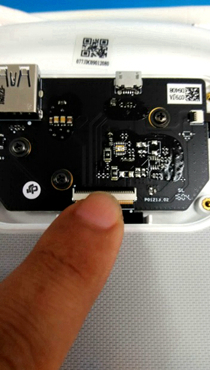
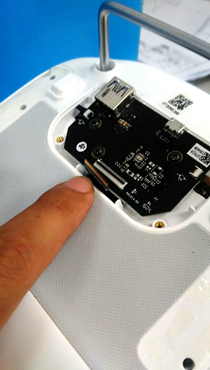
9. |
|
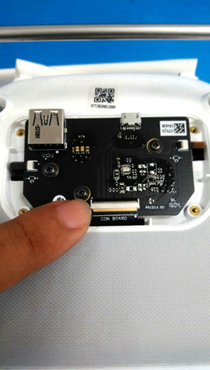
There is a black clip on the flat cable. |
|
10. |
|
Flip black clip up, and remove the flat cable. |
| |
|
|
|
|
|
|
|
|
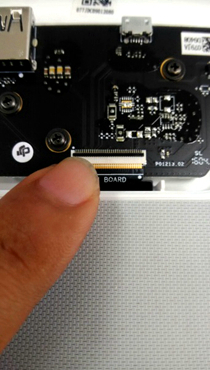
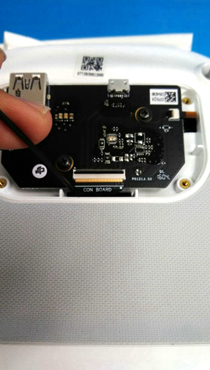
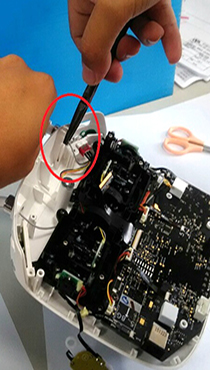
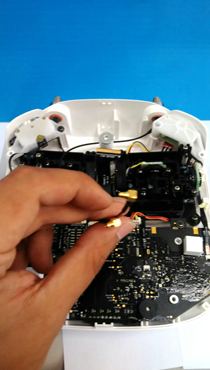
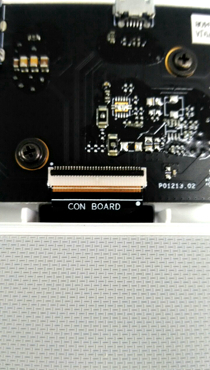
11. |
|
Use hex key to remove the flat cable from black clip slowly and carefully. |
|
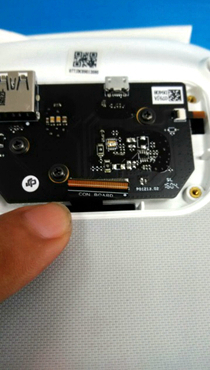
12. |
|
After the flat cable was removed from black clip, you can separate the controller shell. |
| |
|
|
|
|
|
|
|
|
13. |
|
Hold the handle to separate controller shell carefully; do not pull hard to avoid the inner plastic broken. |
|
14. |
|
Open slowly; there is a power line connected with controller bottom shell. |
| |
|
|
|
|
|
|
|
|
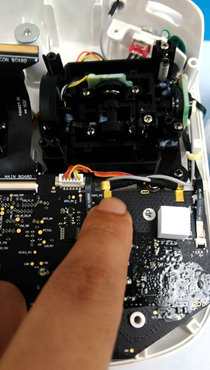
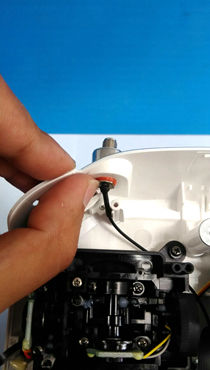
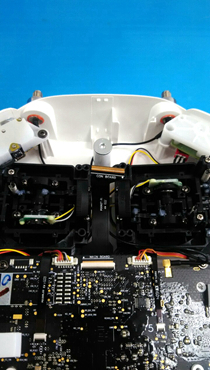
15. |
|
After controller shells were separated, you can see the power line was connected. |
|
16. |
|
Unplug the power line. |
| |
|
|
|
|
|
|
|
|
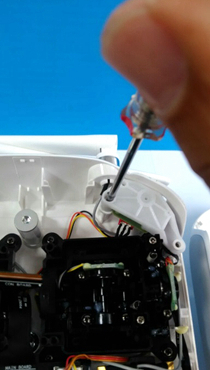
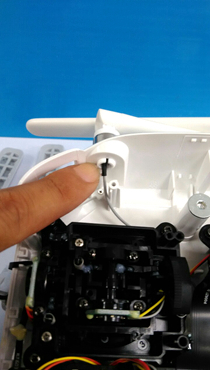
17. |
|
Remove the screw from upper left corner |
|
18. |
|
Remove the screw from upper right corner. |
| |
|
|
|
|
|
|
|
|
19. |
|
Because there is a flat cable connected, take out the control button and hang it on. |
|
20. |
|
Same as step 19. |
| |
|
|
|
|
|
|
|
|
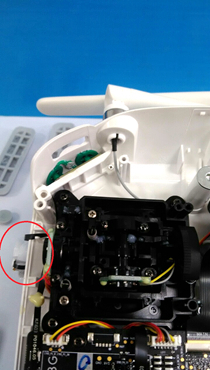
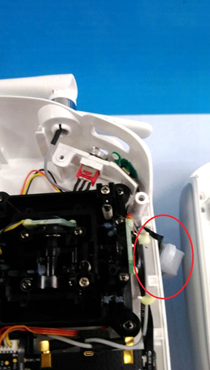
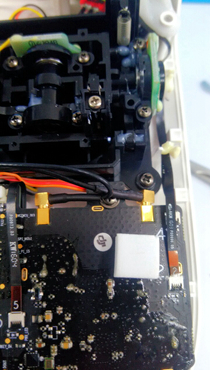
21. |
|
There are two connectors of antenna cable on the right side of the controller. |
|
22. |
|
Use flat blade screwdriver to unplug the connector. |
| |
|
|
|
|
|
|
|
|
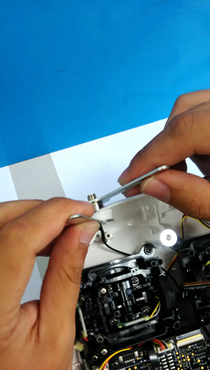
23. |
|
Use needle-nose pliers to clamp the end of antenna. |
|
24. |
|
Pull out the antenna slowly to make the joint separate from mechanism; this step is difficult, please be careful. |
| |
|
|
|
|
|
|
|
|
25. |
|
Pull out the antenna joint a little bit; because the cable is still on the mechanism, so can’t pull out the antenna totally. |
|
26. |
|
Unscrew 4 screws of right side. |
| |
|
|
|
|
|
|
|
|
27. |
|
Right side antenna cable was fixed by glue. |
|
28. |
|
Use scissors or knife to cut the glue; be careful, do not cut the cable. |
| |
|
|
|
|
|
|
|
|
29. |
|
Pull out the antenna. |
|
30. |
|
Pass the cable assembly through the hole. |
| |
|
|
|
|
|
|
|
|
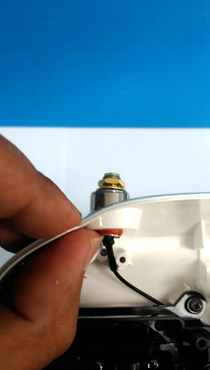
31. |
|
Screw washer and nut slightly. |
|
32. |
|
Use open-end wrench to tighten the nut. |
| |
|
|
|
|
|
|
|
|
33. |
|
Put cable along the mechanism, if cable will not influence the operation of joystick, it will be okay. |
|
34. |
|
Connection:
Left antenna cable plugs right hole.
Right antenna cable plugs left hole. |
| |
|
|
|
|
|
|
|
|
35. |
|
Connector replacement is complete. |
|
36. |
|
Assemble the controller shell. |
| |
|
|
|
|
|
|
|
|
※ NOTICE ※ |
|
|
|
|
Connect the power line before assembling the controller shell. |
| |
|
|
|
|
Flat cable should pass through the hole when assembling the controller shell. |
| |
|
|
|
|
When insert flat cable to the socket, please insert to the position and be careful. |
| |
|
|
|
|
|
|
|